You can provide the user controlled input by performing following steps:
1. Open VBAI and capture the picture.
2. Modify the Inspection Interface, by clicking
Tools ->
Inspection Interface Configuration3. In the Configure Inspection Interface window select
Create New Custom Inspection Interface from: (choose one, most suitable option for your application) and then click
Edit 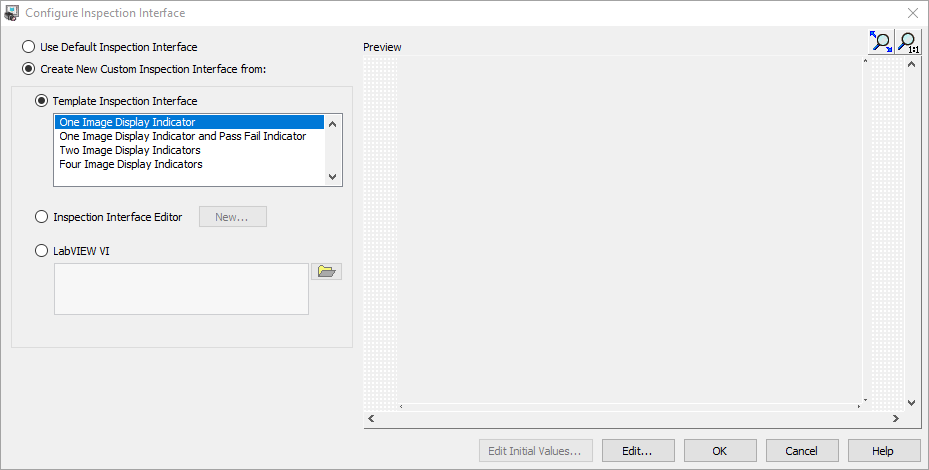
4. In the NI Vision Builder AI - Configuration window add needed controls from the palette (e.g. numeric control called "Numeric INPUT"), click
OK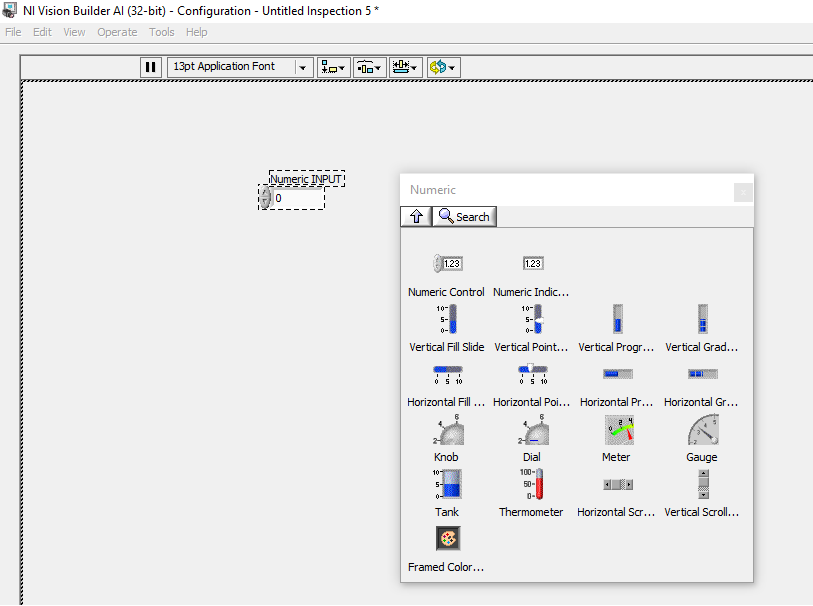
5. Click
OK in the Configure Inspection Interface window
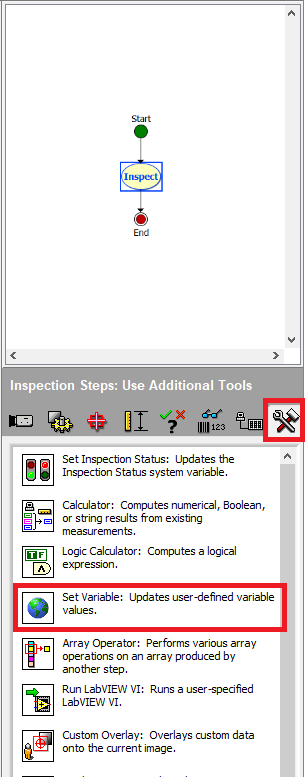
6. From the Inspection Steps functions, select
Use Additional Tools, and then click
Set Variable function
7. Click
OK if No User-Defined Variables window pops-up
8. In the Variable Manager window click
Add9. Write a name for your variable, choose a type and an initial value, click
OK 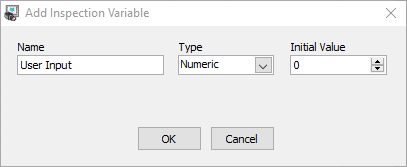
10. Click
OK11. In the Set Variable configuration window, in the Operation tab select
Set to Measurement12. From the drop down list select
User Interface Control - Numeric INPUT, click
OK 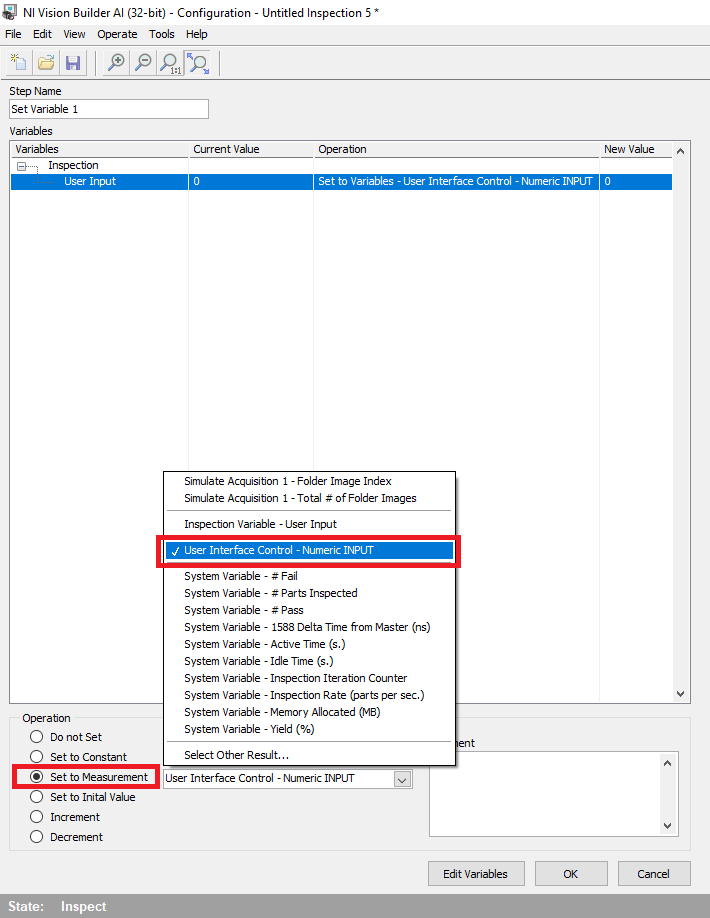
Now the value will be stored in your created variable and can be used in your VBAI sequence.