To use real world units, you will need to calibrate before using Vision Assistant.
- Get a picture with a known size to use as the calibration image.
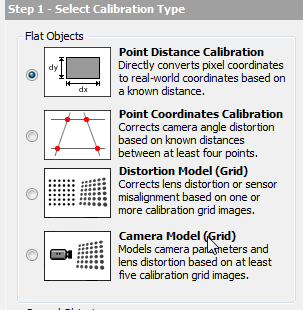
- Choose image calibration function and select New Calibration button.
- Choose the first calibration type, Point Distance Calibration
.

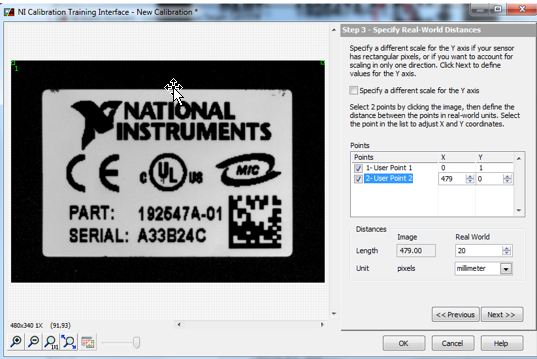
- Choose the calibration image. Click Next.
- Set up the calibration image. For example, as shown below, we need to select two points and give their real world distance filled in the Real World input. Here we select an original point and an X-axis point, and specify the actual distance as 20 mm.

- Click Next, the following settings can all be default.
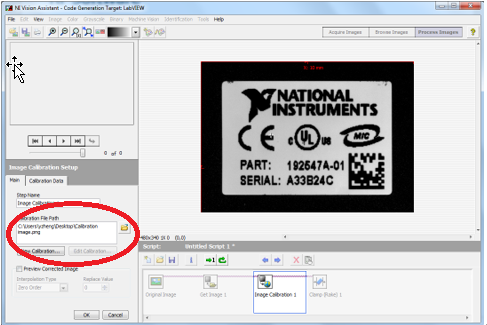
- Save the calibration image and get the calibration image as follow picture. Then click OK.

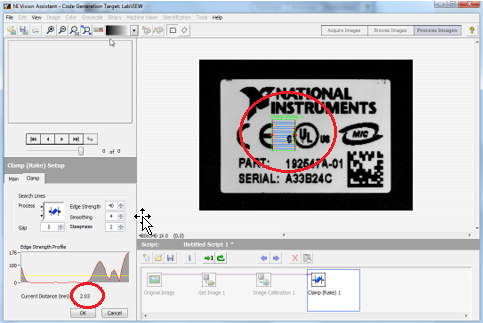
- Choose Clamp (Rake) function, and select the point you want to measure, and get the real-world value as shown below.

Additional Information
You may also use other calibration types by referencing the NI Vision Help.
Usually the measured image and calibration image are different. Make sure all the images are from the same camera and the calibration file is for the calibration image you have selected.