USB cameras are supported in Vision Builder AI with Vision Acquisition Software 2009 and later. The support for USB 3.0 cameras started in the version 2013 of Vision Builder AI. To acquire images from a USB camera in Vision Builder AI, select the
Acquire Image (1394, GigE, or USB) step in the
Inspection Steps: Acquire Images tab. Then select the USB device from the Devices list and configure your acquisition.

If you are using a version prior to Vision Acquisition Software 2009, it is possible to acquire an image in Vision Builder AI from USB cameras using the Run LabVIEW VI step and the IMAQ for USB driver for versions earlier than Vision Acquisition Software 2009. The procedure for doing so is as follows:
- Create a VI in LabVIEW that performs a snap using the IMAQ for USB driver linked below in the Related Links section. An image buffer should not be created inside of the VI. Instead, the VI should accept an image buffer as an input.
- In your Vision Builder AI inspection, add a Simulate Acquisition step. This step creates an image buffer which we will pass to the VI. It does not matter what image file this step is set up to load, since the VI will overwrite the image buffer .

- Add a Run LabVIEW VI step to the inspection.

- For the VI Path field in the property page for the step, press the Browse button and navigate to the VI you just created. VBAI may attempt to run the VI once and will return an error. This is expected. You may select Continue.
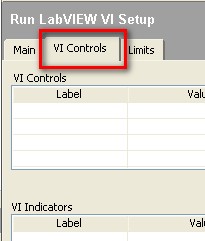
- Select the VI Controls tab in the property page for the step.

- To configure the VI to use the image buffer from Vision Builder AI, press the Configure button. In the list VI Controls, select the name you gave the image control in the VI (default will be Image In.)
- Select the Use Measurement radio button.
- Select Simulate Acquisition 1 (or the name you gave the Simulate Acquisition step) in the Measurements list.
- Press OK.
- The step will now run once. If it worked correctly, you will see an image acquired from your USB camera in the Main Window of Vision Builder AI.
Additional Information
If you choose to use this method, keep in mind that performing USB camera acquisitions over time using the NI-IMAQ for USB driver may cause problems due to a known memory leak in the driver. This is documented in the
Known Issues section of the
NI-IMAQ for USB Cameras Examples page.