Solution
When using a FPGA-based frame grabber, you will not be able to detect your camera in NI MAX. A FPGA-based frame grabber does not use the NI-IMAQ driver or camera files because all communication is done through the FPGA. However, it is possible to detect your camera in pylon's software by running a serial interface on the FPGA.
Perform the following steps to access your camera through pylon:
- Open any FPGA example for the frame grabber you are using. Any example can be used for the purpose of configuring the camera because the serial interface is the same on all FPGA frame grabber examples.
- Compile the FPGA code for the frame grabber and run the host VI. This will open a serial server on your PC for the board that it is accessible via TCP. Commands sent there will be tunneled across the FPGA's serial pins to the camera. Leave this VI running for the rest of the steps, so that pylon can communicate with the camera.
- Provide a virtual serial port for the frame grabber by opening Measurement & Automation Explorer (MAX) and selecting Tools»NI Vision»Select CLSerNat Systems. Check all available options, and hit OK.
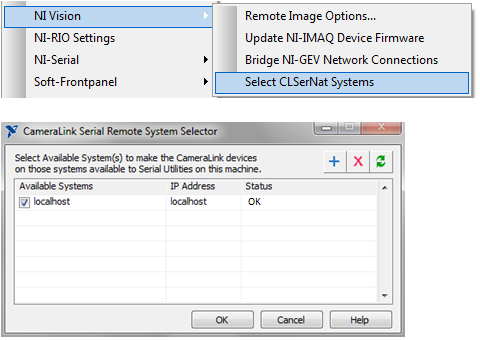
Note: It is possible that the Status column in the CameraLink Serial Remote System Selector may say Software Update Required. If that is the case, make sure that the example Host VI is running in LabVIEW. If you still see this message,and are using a Basler camera, you can ignore it and continue to step 4.
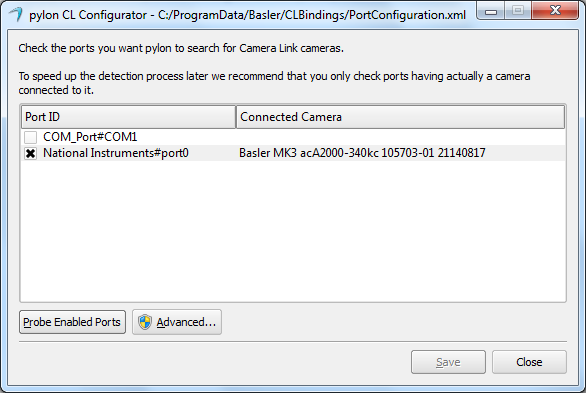
- Use the Basler pylon CL Configuration Tool and probe the National Instruments port. If prompted to lower the baud rate, choose Yes.
- After probing, the camera’s make, model, and serial number will be visible. Click Save, and close pylon CL Software.
- Open Basler pylon Viewer, choose the camera link device, and change the User Level to Guru.
- Expand the Basler camera in the Features window, and expand Image Format Controls. Set the pixel format to the appropriate setting, in this case 10-bit.
- Expand AOI Controls, and ensure the image width and height match the camera’s resolution.
- Expand Transport Layer, and change the Tap Geometry to the appropriate setting, in this case 2X10⁻¹Y.
- Once you change the settings, they are automatically saved.
- Stop the running Host VI and restart it for the changes to take effect.
The camera should now be configured correctly, and images can be acquired in LabVIEW.
Note: If you are not using a Basler camera, you will need to reach out to the 3rd party vendor to acquire their camera configuration software, and get proper guidance on how to interact with FPGA Camera Link cards