Solution
You can use Application Builder to combine your custom .𝚒𝚗𝚒 file with the default 𝙴𝚡𝚎𝚌𝚞𝚝𝚊𝚋𝚕𝚎 𝙽𝚊𝚖𝚎.𝚒𝚗𝚒 file into a single .𝚒𝚗𝚒 file. You must have your custom .𝚒𝚗𝚒 file saved in the project in order to add it, as shown in the photo below.

Next, follow the steps below to accomplish combining the .𝚒𝚗𝚒 files.
- Right-click on your executable build specification and select Properties.
- In the properties window, select the Advanced category.
- In the configuration file in project section:
3.1. For LabVIEW 2010 and later: Check
Use Custom Configuration file 
3.2 Prior to LabVIEW 2010: Uncheck the box next to
Use the default LabVIEW Configuration file (LabVIEW.ini)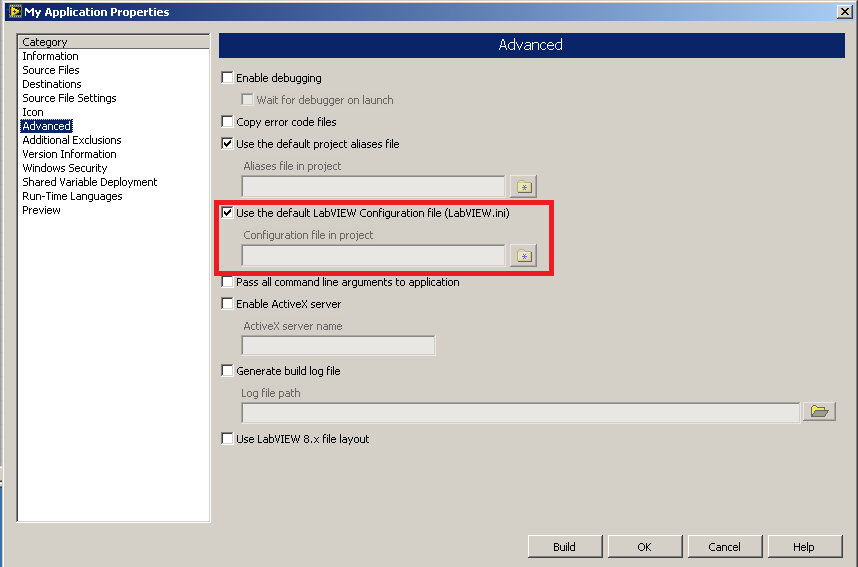
4. In the
Select Project File dialog, either select the custom .𝚒𝚗𝚒 file if it is in your project or click
Add... to browse for it.
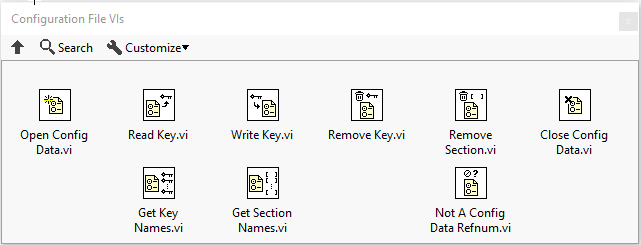
5. If you are using Configuration File I/O VIs from the palette below:
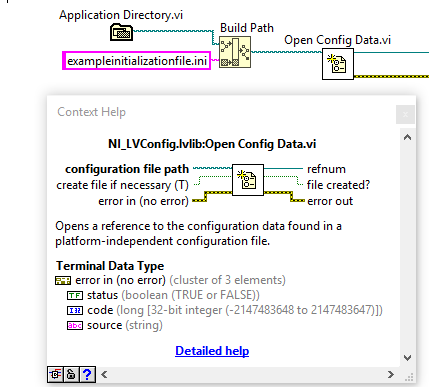
Ensure that all of your configuration file accesses within your application point to the new location which is at the same level as the executable, as shown below:
6. Rebuild the application.
7. Note the name of the 𝙴𝚡𝚎𝚌𝚞𝚝𝚊𝚋𝚕𝚎 𝙽𝚊𝚖𝚎.𝚒𝚗𝚒 file generated from the build. You might need to rename the file generated to match the name of the .𝚒𝚗𝚒 file referenced by your LabVIEW code in the 𝙾𝚙𝚎𝚗 𝙲𝚘𝚗𝚏𝚒𝚐 𝙳𝚊𝚝𝚊.𝚟𝚒 as shown above. After renaming the 𝙴𝚡𝚎𝚌𝚞𝚝𝚊𝚋𝚕𝚎 𝙽𝚊𝚖𝚎.𝚒𝚗𝚒 file generated, the final result should look like this:
