To set the chart to start at 0 seconds the following steps are required:
- Right click on chart >> Properties
- Select Display Format >> Relative Time >> HH:MM:SS
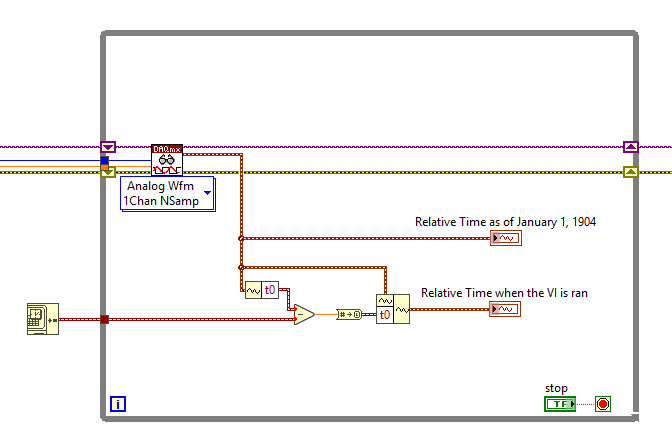
- In the code use the Get Date/Time In Seconds function to find the timestamp when the code starts running
- Subtract that from the initial waveform
- Input resulting waveform into Waveform Chart indicator
The code to carry this out can be seen below:

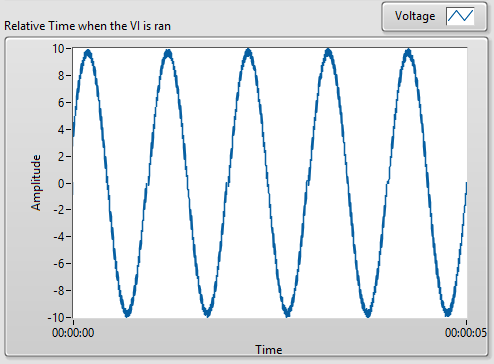
The resulting chart will look as follows:

Using DAQ Assistant
If you are using the DAQ Assistant, the data will be in the format 'dynamic data type'.
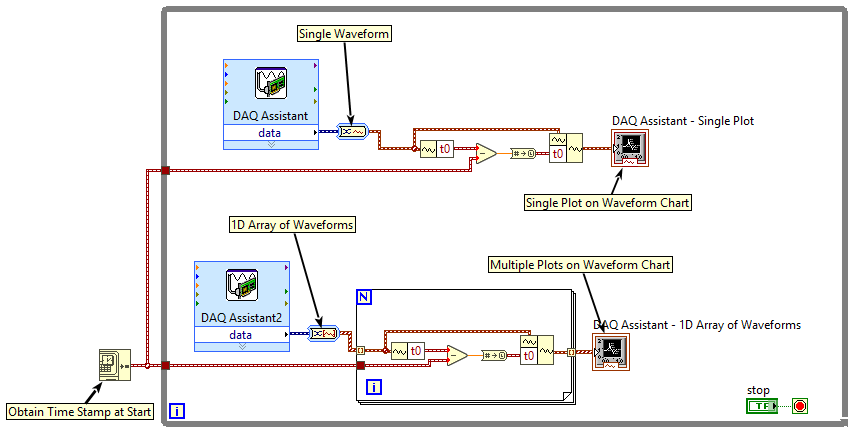
To achieve a time x axis that starts at 0 seconds, please follow the next steps:
- Make sure you have your DAQ Assistant inside a While Loop.
- Add a Get Date/Time in Seconds to your diagram. Right-click the block diagram and select Programming>>Timing>>Get Date/Time in Seconds and drop it outside your while loop.
- You will need to convert your 'dynamic data type' from the DAQ Assistant to a 'waveform data type'. You can find the conversion function by right-clicking your block diagram and select Express>>Signal Manipulation>>From DDT.
- Drop the function and a window will pop up. Choose 1D array of waveform and then wire the data output of the DAQ Assistant to the input of the Convert from Dynamic Data.
- Add a Get Waveform Components to your diagram. Right-click the block diagram and select Programming>>Waveform>>Get Wfm Comps and drop it inside your while loop.
- Wire the output of Convert from Dynamic Data to the input of Get Wfm Comps. Click the right square and change the attribute to t0.
- Add a subtract function. Right-click the block diagram and select Programming>>Numeric>>Subtract and drop it inside your while loop. Wire the output of Get Date/Time in Seconds to the second input of Subtract and the output of Get Wfm Comps to the first input.
- Convert the Subtract result to a time stamp. Right-click the block diagram and select Programming>>Numeric>>Conversion>>To time stamp and drop it inside your while loop. Wire the output of Subtract to the input of To time stamp.
- Add the new time stamp to the original waveform. Right-click the block diagram and select Programming>>Waveform>>Build Waveform and drop it inside your while loop. Wire the output of Convert from Dynamic Data to the top input of Build Waveform. Wire the output of the conversion function To time stamp to the bottom input of Build Waveform and change the attribute to t0.
- Wire the output of Build Waveform to the input of your waveform chart. It should start plotting at 0 seconds.

Find a VI version of this image attached.
Ensure the DAQ Assistant is linked correctly to your hardware and physical channels.
Additional Information
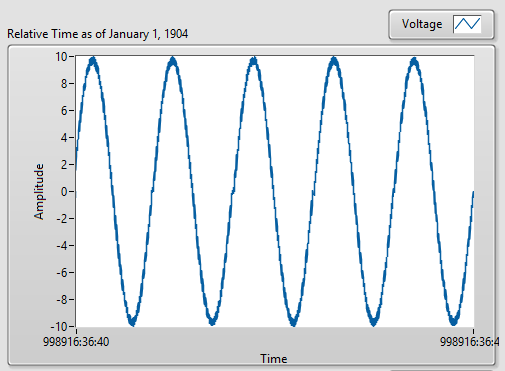
Waveform data contains the timing information from the system that the code is run from and is taken as the number of seconds since 12:00 a.m., Friday, January 1, 1904, Universal Time. LabVIEW then formats that number into the current date and time.
If the chart set to work with relative time the following image will be seen as the code only knows the reference of 01/01/1904 and displays the number of hours and minutes since that date as the "Relative Time."
