In order to create a wireless network between the cDAQ-9181 and your computer, you will need to use the cDAQ-9181 and a router. Please refer to the following steps to set up your cDAQ-9181 and realize wireless data transfer between the device and your computer.
1. Place the cDAQ module into the cDAQ-9181. Attach the power cord and plug it into power on the cDAQ-9181.
2. Open Measurement&Automation Explorer (MAX) and navigate to
Devices and Interfaces » Network Device.
3. Connect the cDAQ-9181 to the computer. Your device should show up under Network Devices with a white icon next to it. If the device does not show up, try refreshing MAX by pressing F5. And if it still does not show up, try resetting the cDAQ-9191 by pressing the reset button on the back of the chassis. Hold the button for five seconds or longer in order to reboot the chassis into factory default modes. Note that pressing the reset button for less than five seconds reboots the chassis with the current configuration.

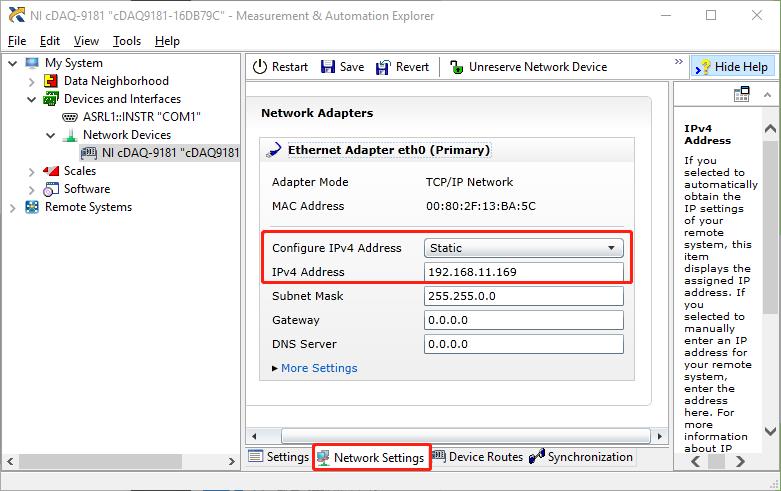
4. Configure the cDAQ-9181 IP address in NI-MAX to be in the same subnet as the router.
5. Disconnect the Ethernet cable connected between the cDAQ-9181 and the PC, and connect the cDAQ-9181 to the router with the cable.
6. Connect the PC to the wireless network generated by the router.
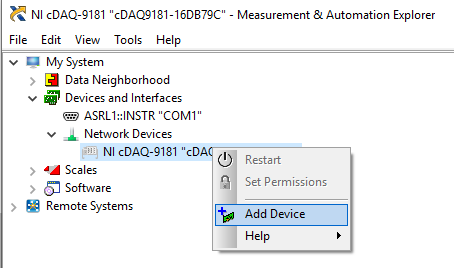
7. Right-click
Network Devices and select
Find Network NI-DAQmx Devices.
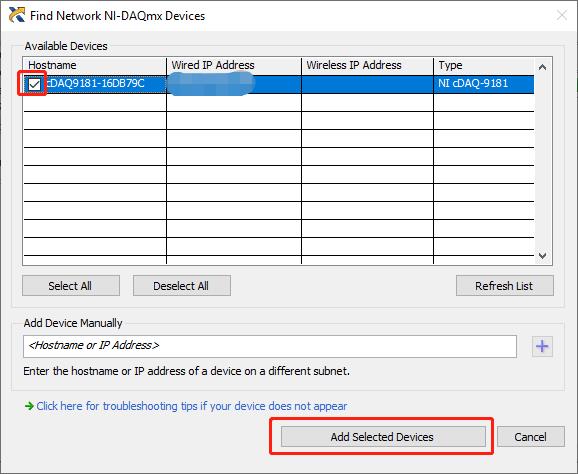
8. In the pop-up window named Find Network NI-DAQmx Devices, it will show you the search result.
- If the device does not show up, click the button labeled Refresh List in the middle right of the window.
- If it still does not show up, try resetting the cDAQ-9181 by pressing the reset button on the back of the chassis and begin back at step
- Hold the button for five seconds or longer in order to reboot the chassis into factory default mode.
9. Select the device by clicking on the box to the left of the device name and then press
Add Selected Devices. The device will now display in MAX with a colored icon on the left to indicate it has been added. The module inside will populate automatically.