Solution
If you would like to set more than one chip select on your NI USB-845x, you can use the Advanced SPI API. This API uses scripts to implement communication between the NI USB-845x and its slave devices.
When using the Advanced SPI API, the user has to wait until the entire program has completed on the NI USB-845x to see the timers update or see the data. This can be overcome by using the Basic API, which does not run a script on the NI USB-845x, but sends commands to the device to perform the operations. The downside is that sending these commands using the Basic API is not as efficient. When performance is critical, it is highly advised to use the Script API.
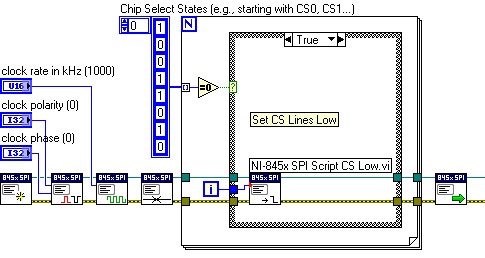
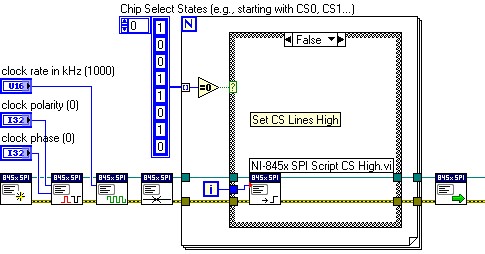
When you need to implement multiple chip selects, you do this in the beginning of your SPI programming. This programming looks similar to the image below.
In the True Case:

In the False Case:

Before using the
NI-845x SPI Run Script.vi, you would program the instruction you want to send to your particular slave device. This is dependent on the slave device being controlled by the NI USB-845x.
 NOTE:
NOTE: For in-depth examples of the Advanced SPI API, open LabVIEW. Navigate to
Help»Find Examples. When the Example Finder window opens, proceed to
Hardware Input and Output»I2C and SPI»SPI Advanced.