The Cold Junction Compensation (CJC) is active by default and is used in the calculation for your temperature readings by default. However, you also have the option to change the
CJC Source property. This property can be accessed either by
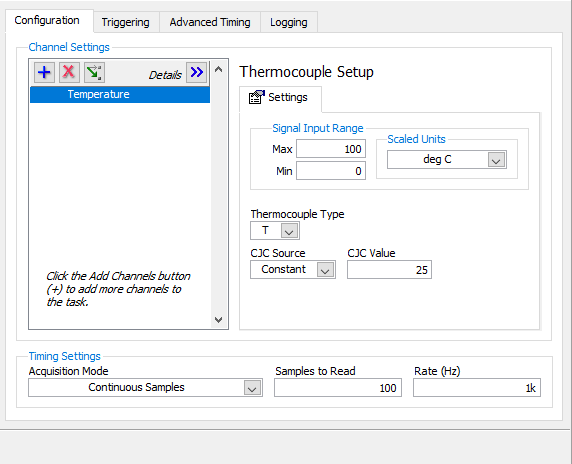
creating a DAQmx task in NI Measurement & Automation Explorer or using the DAQ Assistant in LabVIEW. The image below shows an example of what you will see when changing this property.
 Note:
Note: The
CJC Source property has the following three options. Choose the one below that works best for your application:
1.
Built In - This is the default option and uses the built in CJC in your device to give you temperature readings.
2.
Constant - Allows you to use a constant value from which your temperature readings will be calculated.
3.
Channel - Allows you to use a external CJC routed to a channel on your device.
Additional Information
To read data directly from the built- in CJC, see the following:
Read Data from the Built-In CJC Sensor on DAQ Device in LabVIEW