Wiring the modules
First, you need to wire the modules in one of the supported patterns to allow them to recognize each other and communicate properly. To achieve this, there are two basic configurations,
star, and
daisy-chain.
Please note that on the NI-9469 modules, port 0 is an input, while ports 1 and 2 are outputs.
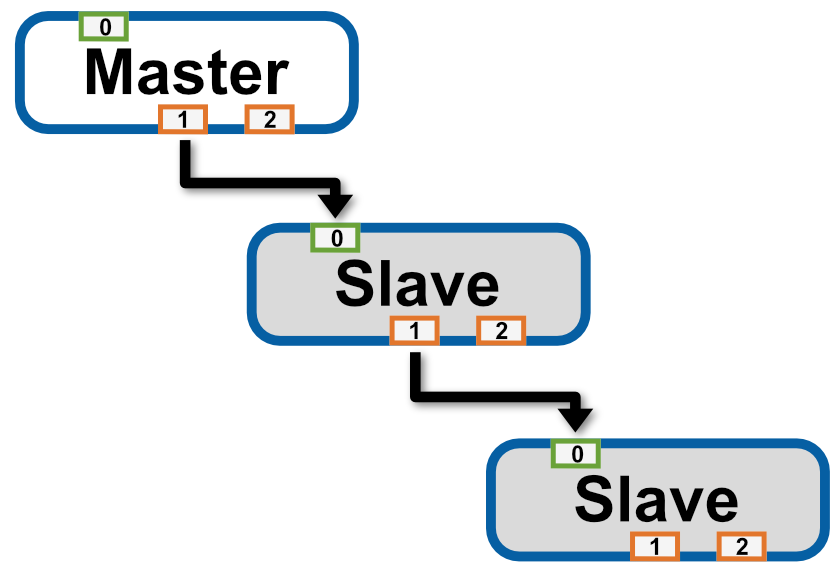 | 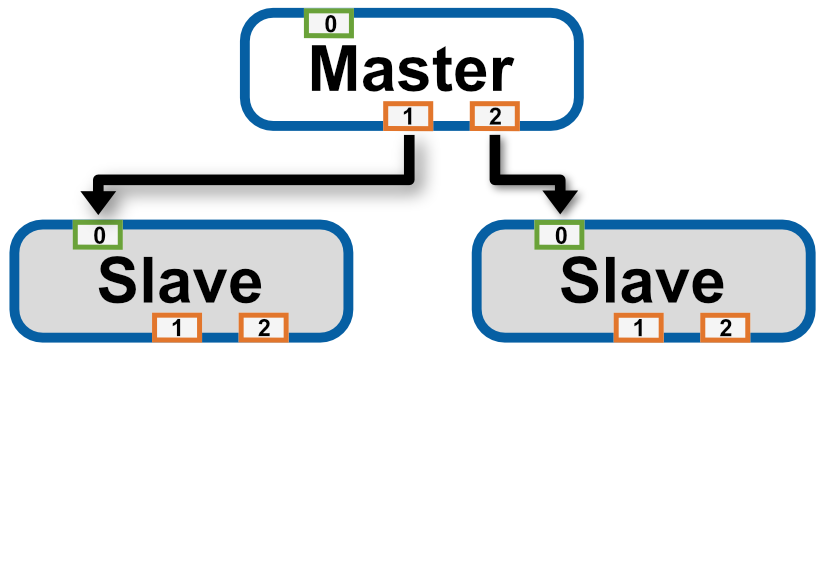 |
| Daisy-chain configuration | STAR configuration |
Configuration in NI-MAX
Please refer to
Configuring the NI 9469 in NI Measurement & Automation Explorer (MAX)
Using synchronization in LabVIEW
After setting the synchronization properties as described above, you can start developing your LabVIEW DAQ project. Before configuring your DAQmx modules it is necessary to use the
DAQmx Auto-Configure cDAQ Sync Connections VI
- Palette: Measurement I/O >> DAQmx - Data Acquisition >> DAQmx Advanced >> DAQmx System Setup >> DAQmx cDAQ Sync
Please refer to the code section below for examples of synchronized Tasks.
Example 1 - Synchronized Digital Waveform Output with common sample rate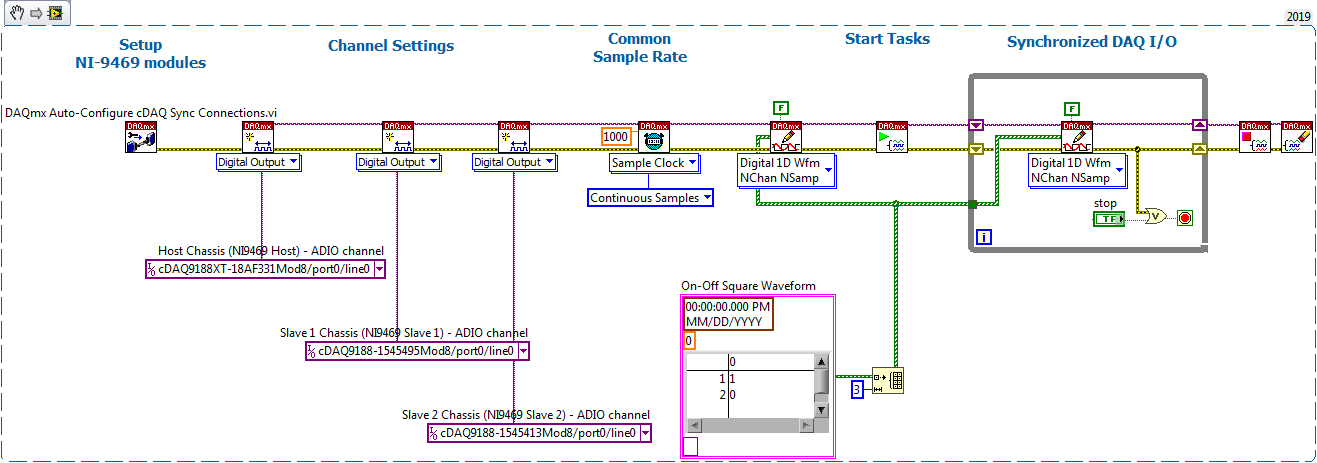
Note: This image is a LabVIEW snippet, which includes LabVIEW code that you can reuse in your project. To use a snippet, right-click the image, save it to your computer, and drag the file onto your LabVIEW diagram.
Example 2 - Synchronized Digital Output and Analog Input Tasks with different sample rates
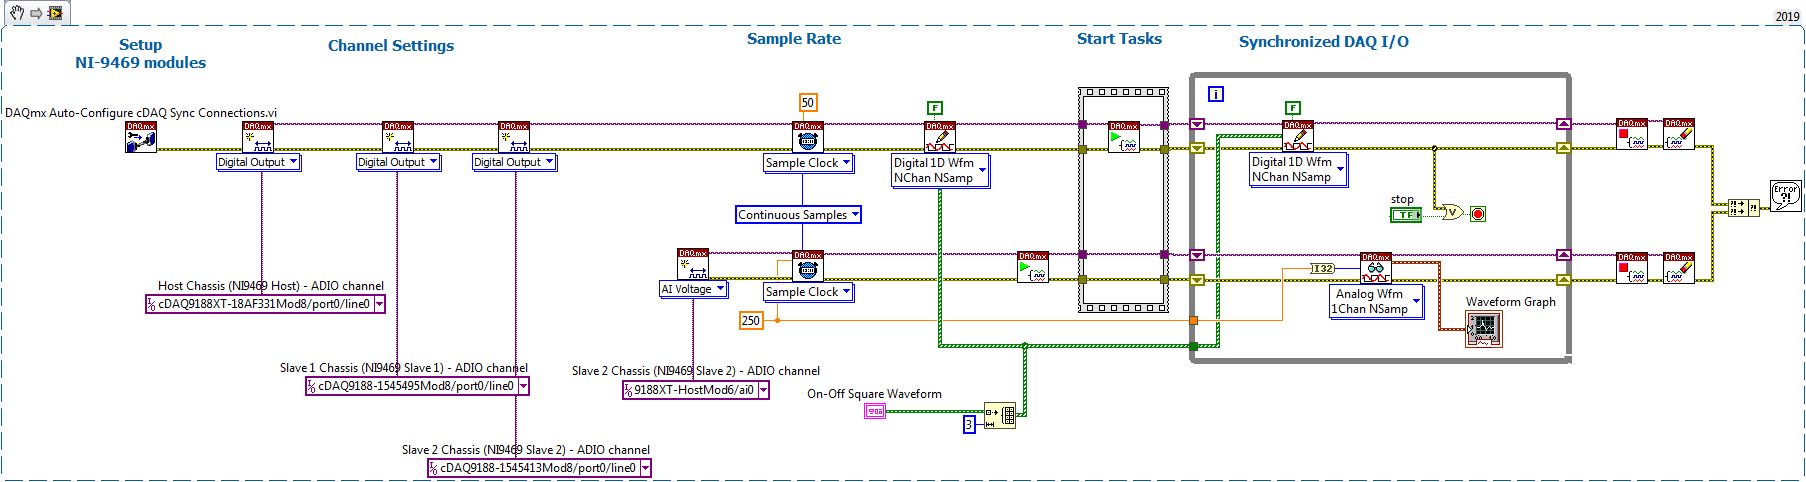 Note:
Note: This image is a LabVIEW snippet, which includes LabVIEW code that you can reuse in your project. To use a snippet, right-click the image, save it to your computer, and drag the file onto your LabVIEW diagram.
Example 3 - Programmatic synchronization setup via LabVIEW
Instead of using configuration via MAX or using Auto-Configure VI, you can also set up the synchronization options via LabVIEW. The order of the connection port strings within the string array is not important. The example below shows a While loop that retries the setup until the connection succeeds.
 Note:
Note: This image is a LabVIEW snippet, which includes LabVIEW code that you can reuse in your project. To use a snippet, right-click the image, save it to your computer, and drag the file onto your LabVIEW diagram.