Solution
To reset the IP address of your USRP device to the default, you will first need to identify the current IP address of the device, and change it to a temporary intermediate IP address.
To do so, you will first need to find an IP address that is not in use. When you temporarily change the IP address of the USRP, you will change it to this IP address. Turn the USRP off and on before you start this process.
- Start with your computer connected to your network as normal
- Open the command line by typing cmd.exe into the Windows Start Menu.
- Type arp -a and press Enter.
- Make a note of an unused IP address from the ones listed.
- The IP address of your computer will not be listed here, so make sure you are not including that either.
The next step is finding the current IP address of the USRP.
- Connect the USRP directly to the computer (make sure the USRP is not in safe mode).
- See your device's documentation for more details on how to confirm this.
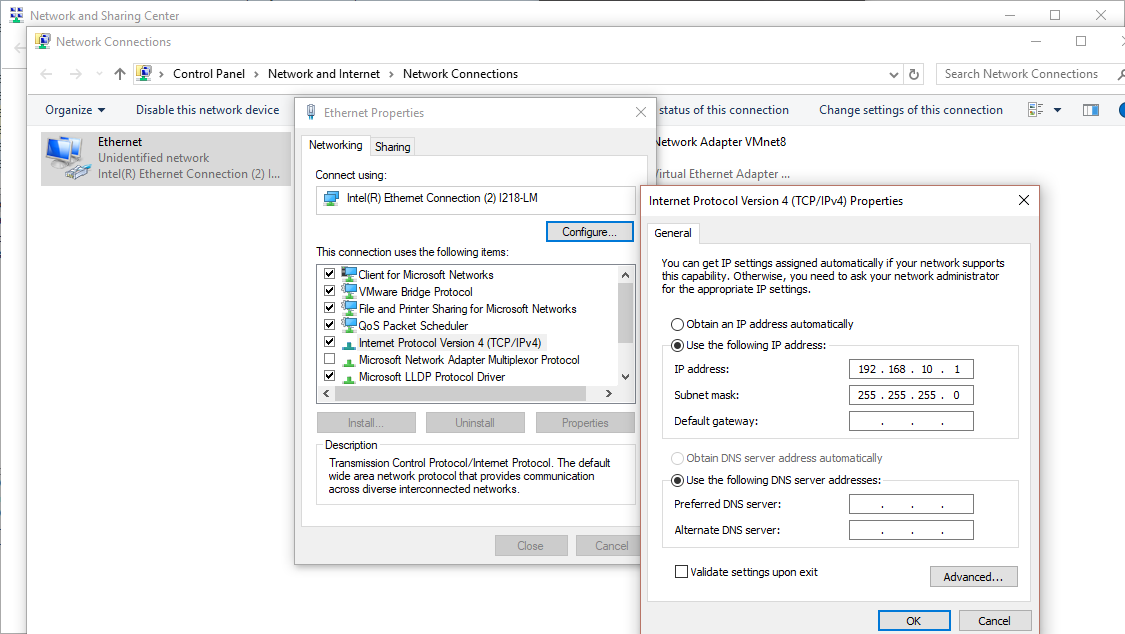
- Change your IP address to 192.168.10.1 using the Network and Sharing Center in Windows, with a subnet mask of 255.255.255.0:
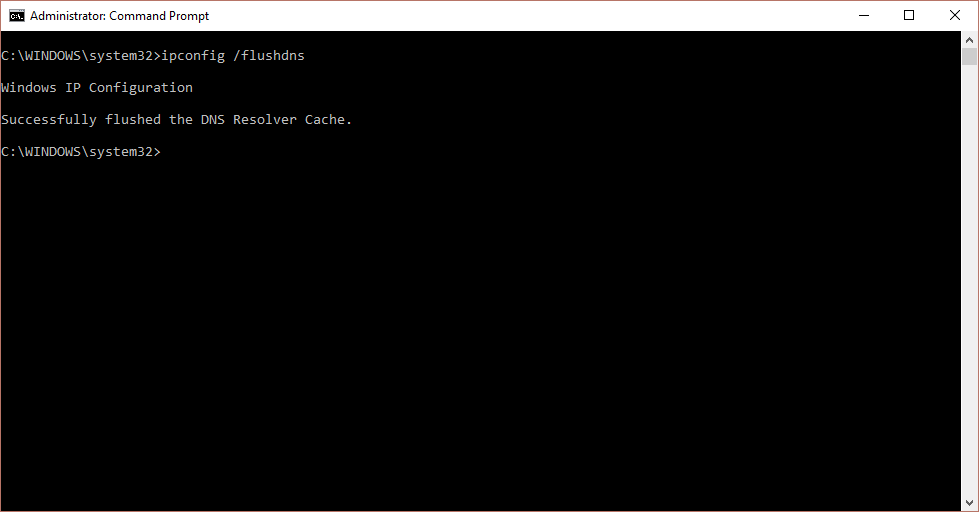
- Type ipconfig /flushdns and press Enter. This is what a successful flush will look like:
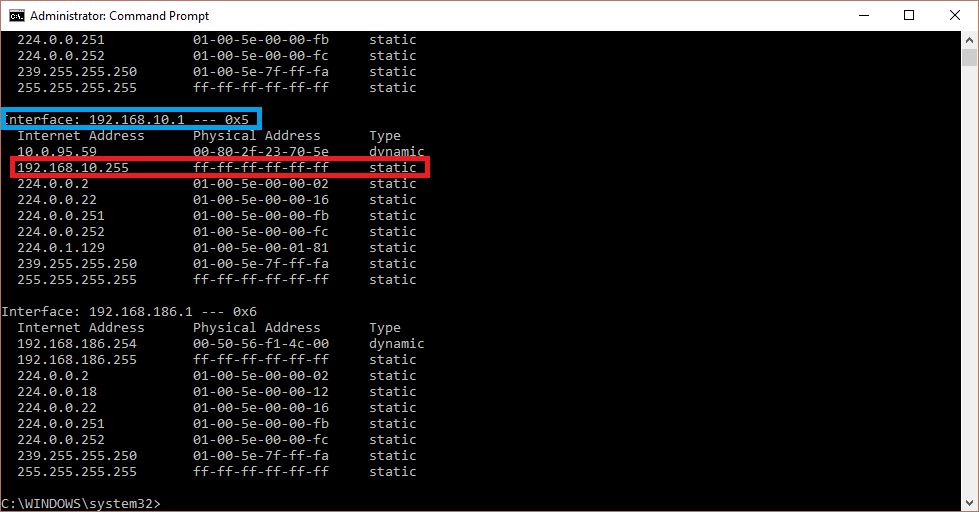
- Type arp -a and press Enter.
- Find the entry in the cmd window that starts with 192. It should be 192.168.10.255 or something similar:
- Open Wireshark as an admin and start a local area network capture by double-clicking Local Area Connection to start a local area network capture. If this option is missing, ensure that you ran the application as an admin.
- If you don't have Wireshark installed, you must download and install it first.
- Return to Windows Command Prompt and type in ping <IP address>, which is the IP address identified in the first section in step 4.
- Go back to Wireshark and look in the list for an IP address that is neither 192.168.10.1 or the IP address recorded from the first section in step 4. This will likely be located in the Source column.
- This is the USRP sending a ping reply back to the computer even though it was not the intended target:
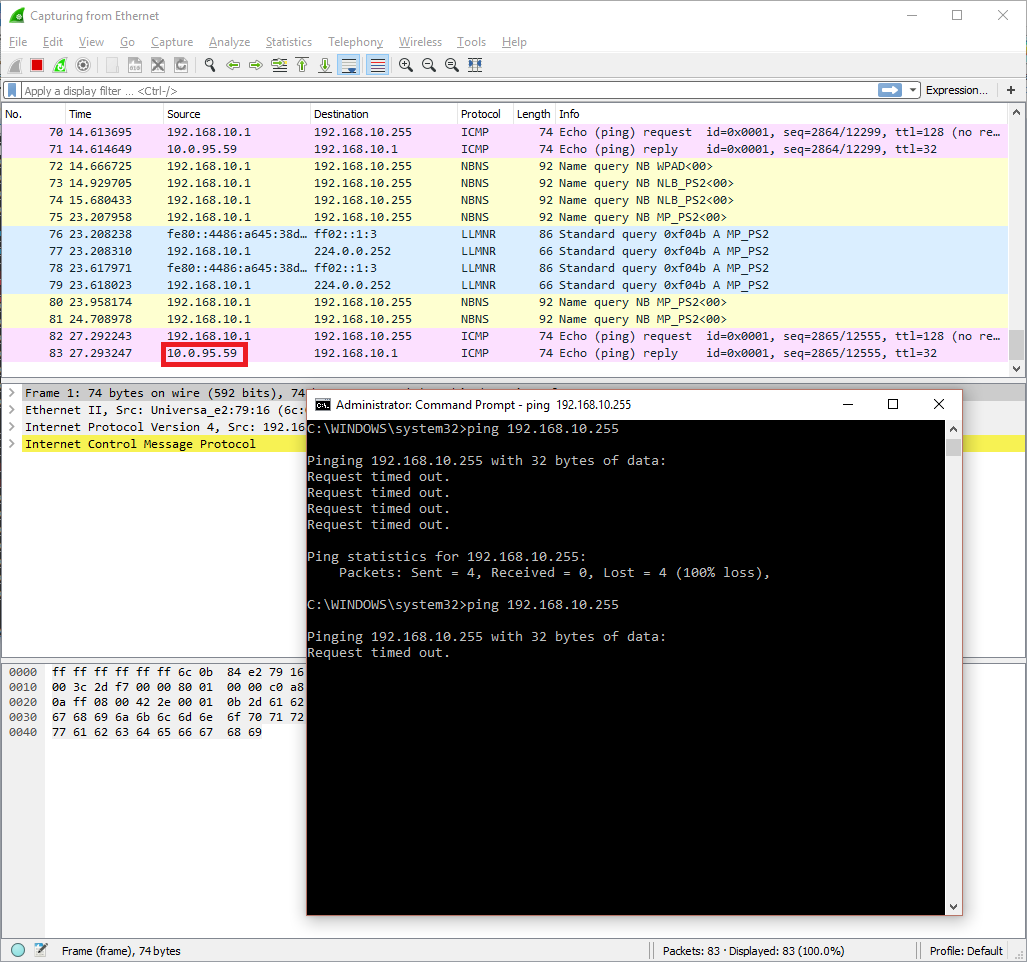
- Record the IP address found in step 8. In this case, it is 10.0.95.59.
Finally, you have to set the IP address of the USRP back a known IP address your computer can communicate with:
- Change your computer’s IP address to be on the same subnet as the IP address of the USRP in Windows Network and Sharing Center, as done in the first section.
- Make sure the subnet mask is 255.255.255.0.
- The first three numbers of your computer's IP address should match that of the USRP.
- Open the USRP Configuration Utility to discover the USRP.
- Use the tool to set a new IP address, the one noted in step 4 of the first section:
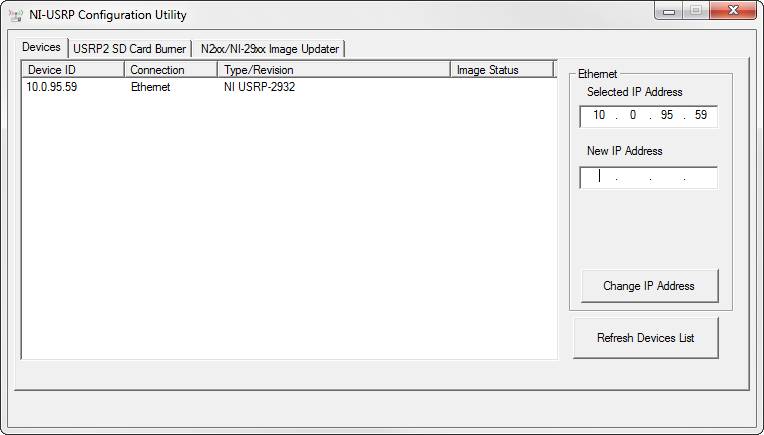
- The device may disappear from the Configuration Utility, as you are setting it to be on a different network than the one you are currently on.
- Set your computer's IP address back to the default via Windows Network and Sharing Center so that you are connected to your network again. You should now be able to view your USRP in the USRP Configuration Utility.
Now that you know the IP address of your USRP and your computer is able to communicate with it, you can change it to another intended IP address (like the default) using the USRP Configuration Utility.