このコンテンツは設定された言語で表示できません。

このコンテンツは表示可能な別の言語で表示されています。 お使いのブラウザに翻訳機能がある場合はご利用ください。

Error -63040 Connection Not Established Using LabVIEW FPGA

Updated Jul 31, 2023

Reported In

Hardware

  • CompactRIO Chassis
  • CompactRIO Controller
  • CompactRIO Single-Board Controller

Software

  • LabVIEW FPGA Module
  • LabVIEW

Driver

  • NI CompactRIO

Issue Details

When I try to:
  • Run my FPGA VI
  • Open a reference to an FPGA card in another computer, PXI chassis, or CompactRIO
  • Compile my FPGA code on my sbRIO
  • Deploy my FPGA code to my sbRIO-9627
I get the following error message: 
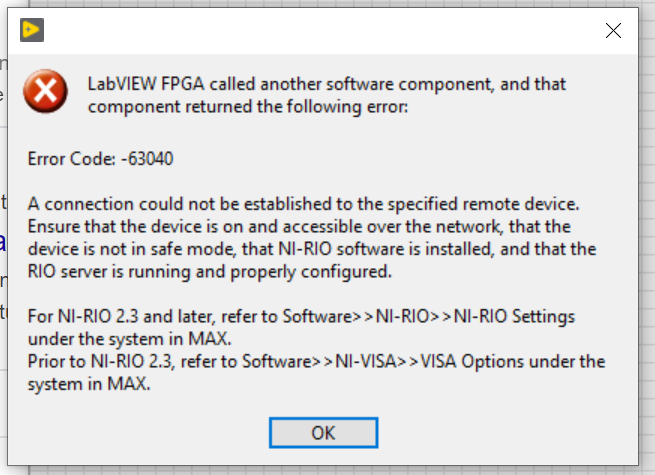
Error -63040: NI-RIO FPGA Communications Framework: (Hex 0xFFFF09C0) A connection could not be established to the specified remote device. Ensure the device is on and accessible via the network, and that it is listening on the correct port.

Error Code -63040: A connection could not be established to the specified remote device. Ensure the device is on and accessible via the network, that the device is not in safe mode, that NI-RIO software is installed, and that the RIO server is running abd properly configured. 

For NI-RIO 2.3 or later, refer to Software>>NI-RIO>>NI-RIO Settings under the system in NI MAX. 

Prior to NI-RIO 2.3, refer to Software>>NI-VISA>>VISA Options under the system in NI MAX. 


Note: In LabVIEW Version 2017 and earlier the error code of this error was -63044.

Solution

This error code indicates that the RIO device is unable to communicate over the network and might be caused by the following reasons:


NI CompactRIO Driver Versions

Ensure that the version of NI CompactRIO Driver on the host PC is the same on the RIO device. This can be checked by following the steps below:

  1. Open NI Measurement & Automation Explorer (MAX). For that, navigate to the Windows Start Bar and type in "MAX".
  2. Under My System tab, open the Software branch.
  3. Look through the list of software to ensure that NI CompactRIO is installed and make a note of the version. If it is not installed, refer to this article for guidance to install NI CompactRIO driver
  4. Under the Remote Systems tab, locate the RIO device and open the device's branches.
  5. Confirm the NI CompactRIO driver on the Development system and Deployment system are the same version:
    • Development: In NI MAX under My System >> Software 
    • Deployment: In NI MAX under  Remote Systems >> [Your Target] >> Software
    • If the versions do not match, install the correct version of NI CompactRIO Driver to your Development and/or Deployment system. 
Note: Make sure the NI CompactRIO version supports the RIO device and LabVIEW version installed. Such information can be found the readme documents on the NI CompactRIO download page. 

Ethernet Connection

If connecting the device over Ethernet, ensure that the Ethernet connection has been established properly. This can be tested by following the steps below:

  • Try using a different Ethernet cable and different Ethernet ports.
  • Confirm the RIO target can be discovered in NI MAX. 
  • Try setting the IP address of the RIO device to static instead of DHCP.
  • If the computer is using a Static IP then make sure that your Configure IPv4 Address is set to Static. These settings can be found in NI MAX under Network Settings. 
  • If the RIO device is connected to a host PC, try to connect it directly to the network's router if possible.
  • Disable the Windows firewall to ensure that this is not blocking any network communication.
  • Check the RIO device's available memory, as free space is required for network communication to work. This can be seen under the System Settings tab of the device in NI MAX.
  • Avoid using USB to Ethernet Adaptors. These can cause communication problems because they may not be designed to create the USB-ENET bridge required by the RIO device. 
  • If you are connected to the Real-Time target remotely through a Virtual Private Network (VPN), make sure that your internet connection is stable. If the internet connection is very slow, the Real-Time target will timeout before responding, leading to this error.

FPGA Code and Compilation

  • Make sure that the the Real-Time controller that contains the FPGA target is connected to the LabVIEW project:
  •  Try compiling a blank FPGA VI instead. This will identify whether the FPGA code itself is causing the problem.
  • Try using a different compiler (e.g.: if using the cloud compiler, try using the local compiler instead and vice versa).This will identify whether the compiler is contributing to the problem.
  •  If the LabVIEW project consists of Real-Time code, ensure that the Open FPGA VI Reference function is not being called too soon after boot-up.
    • If this function is called in a Real-Time start-up executable that runs as soon as the target boots, then you may need to wait a few seconds before opening the FPGA VI reference.
    • Another approach to avoid an immediate call of the Open FPGA VI Reference function would be:
1. When configuring the Open FPGA VI Reference remove the checkmark from the Run the FPGA VI checkbox in the Configure Open FPGA VI Reference dialog box:


2.Then, use two FPGA Invoke nodes to call the Reset (to reset the FPGA VI to the default state of the VI) and Run Methods:

  • Ensure that all the FPGA references are properly closed using the Close FPGA VI Reference Function.
  • If you are using a resource name pointing to the device IP address to open the FPGA Reference, change it to point to the local resource RIO0.
FPGA Resource Name.png