Depending on the programming mode you selected for the individual module, there are different ways to configure the channels.
Manually in the project explorer (LabVIEW FPGA mode or Real-Time Scan Mode)1. Right click on the module entry in the project and select
Properties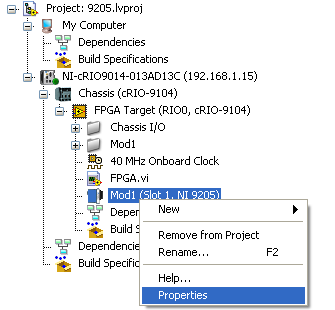
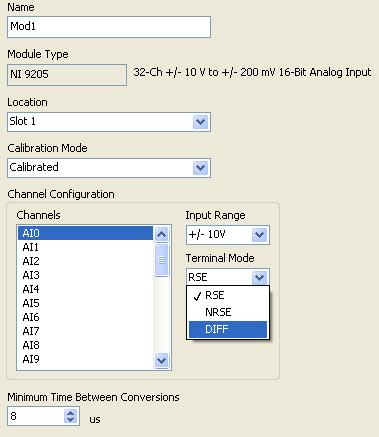
2. In the Module Properties popup, select your desired input range and terminal mode in the Channel Configuration area.
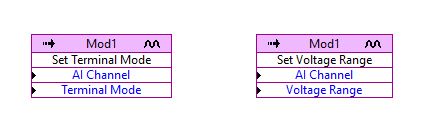
 Programmatically on FPGA (LabVIEW FPGA mode)
You can use the
FPGA I/O Method Node to change the settings:
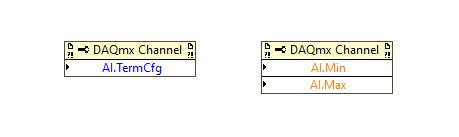
Programmatically in DAQmx (Real-Time mode on cRIO-904x and cRIO-905x )If you are programming your cRIO module with the DAQmx API, you can use a
DAQmx Channel Property Node to change the settings:
 Note:
Note: No all C Series modules support all properties.