There are two methods for including VISA resource settings in a LabVIEW installer. The recommended method is to include the NI MAX Hardware Configuration. An alternative method is to include
visaconf.ini, the VISA configuration file, as a source file in the installer.
Method 1: Including the NI MAX Hardware Configuration (Recommended)
- Open your LabVIEW project. In the LabVIEW Project Explorer, open the Installer Properties dialog. If you already have a build specification for your installer, you can do this by right-clicking on it and selecting Properties. If not, you can create one by right-clicking on Build Specifications, and selecting New»Installer.
- Select the Hardware Configuration category.
- Enable the option to Include hardware configuration from MAX.
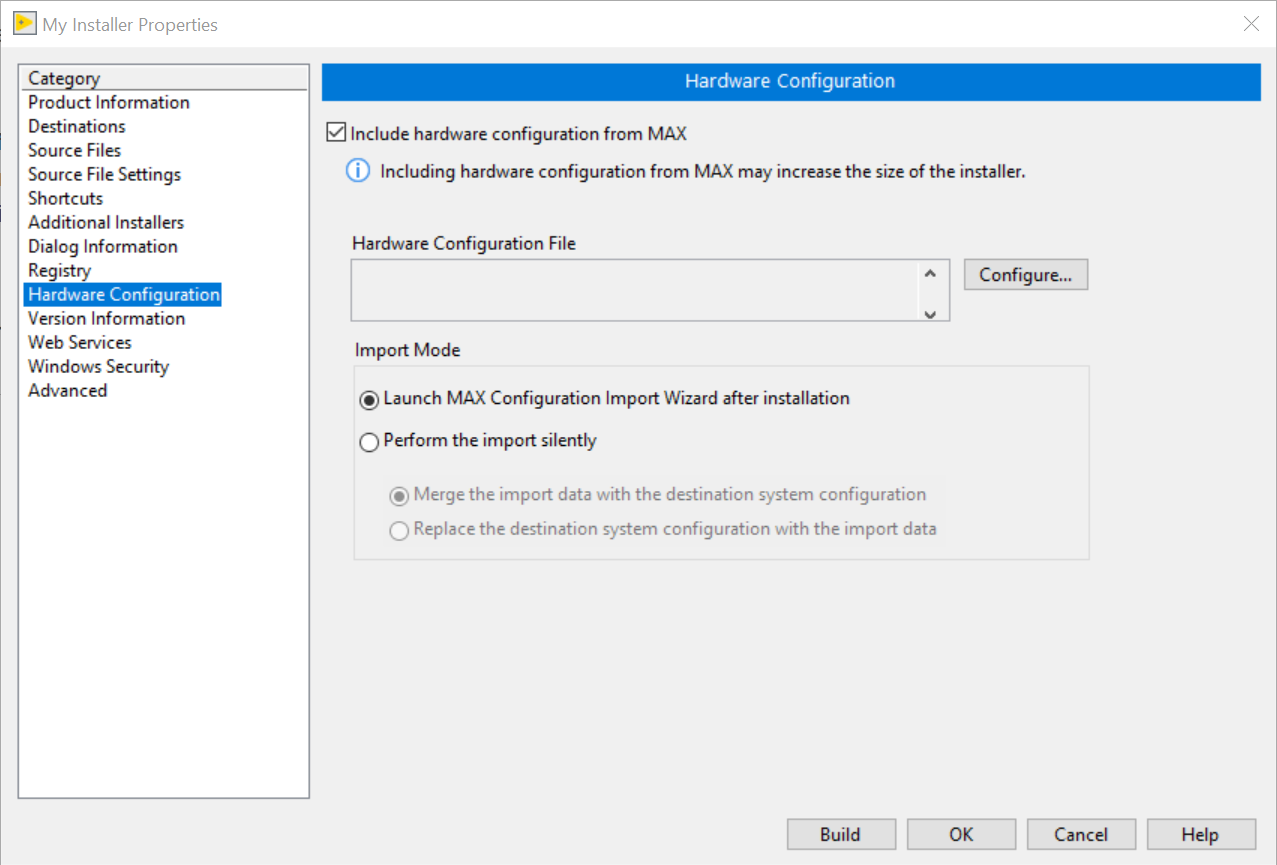
- Select Configure to create a hardware configuration file.
- Select the system whose settings you would like to export and the location for the configuration file. Select Next.
- Select which settings you would like to include in the configuration file. You can choose settings individually or choose the Check All or Check By Product options. If you choose Check By Product, you can choose to export only NI-VISA products.
- Select Export.
- Once the export completes, select Finish.
- Under Import Mode, select the installer behavior you would like. You can either choose to launch the MAX Configuration Import Wizard upon installation to have the user walk through importing this hardware configuration or have the import performed silently.
- Select OK to save your properties and close the Installer Properties window.
Method 2: Including visaconf.ini
- Open your LabVIEW project. In the LabVIEW Project Explorer, right-click on My Computer and select Add»File.
- Navigate to and select
visaconf.ini. The location of this file will depend on your OS:
- Windows Vista/7/8/10:
C:\ProgramData\National Instruments\NIvisa\visaconf.ini.
Note: ProgramData is a hidden folder. To show hidden folders, please see how to do so here: Windows Show hidden folders.
- Windows XP and earlier:
C:\Documents and Settings\All Users\Application Data\National Instruments\NIvisa\visaconf.ini
- In the LabVIEW Project Explorer, open the Installer Properties dialog. If you already have a build specification for your installer, you can do this by right-clicking on it and selecting Properties. If not, you can create one by right-clicking on Build Specifications, and selecting New»Installer.
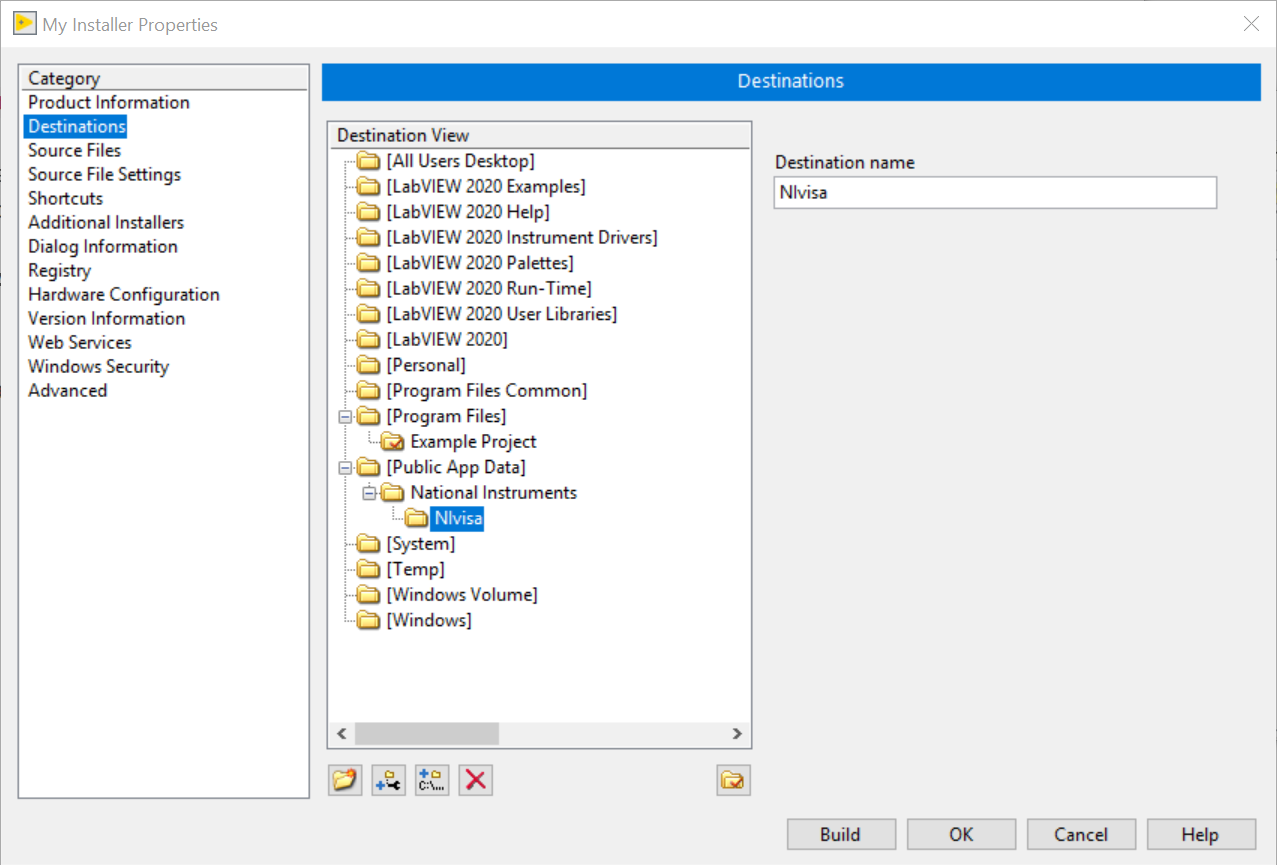
- Select the Destinations category in the Installer Properties dialog.
- Under Destination View, select the [Public App Data] folder, and select the Add destination button.

- Create a new folder named
National Instruments. - Select this new folder and again select the Add destination button. Create a new folder named
NIvisa. The folder names must be spelled correctly in order for the installation to work properly. The destination settings should now look like the image below:
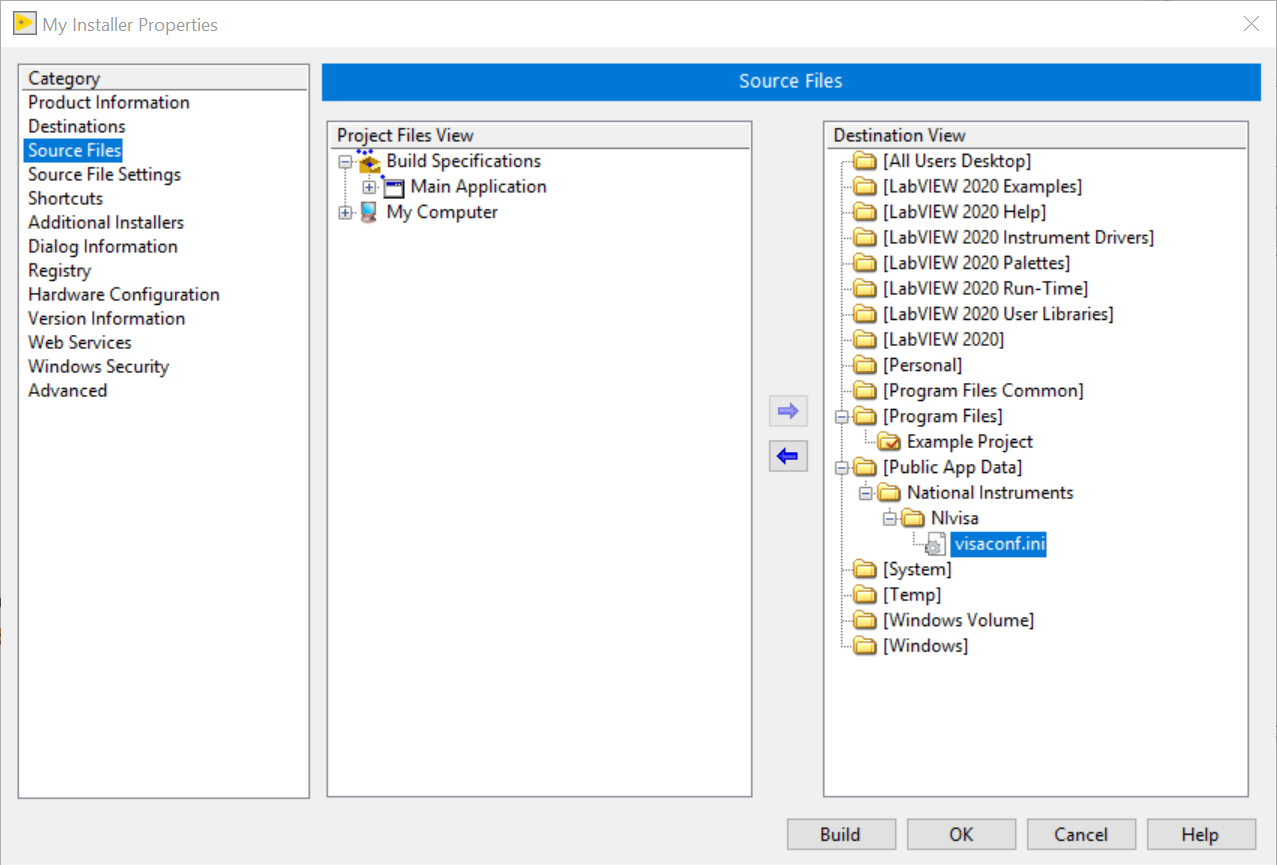
- Navigate to the Source Files category. In the Project Files View section on the left, select visaconf.ini. In the Destination View section on the right, select the
NIvisa folder that you created in the Step 7. Click the Add arrow to add the visaconf.ini to the NIvisa destination folder. Your source file settings should now look like the image below:
- Select OK to save your properties and close the Installer Properties window.
Additional Information
After completing one of the methods above, your installer will now be configured to export the VISA resource settings. To build your installer, right-click on your installer in the Project Explorer and select
Build. Your installer will be built to the
Installer destination specified in the Installer Properties under the Product Information category.
Note: Because your application uses the NI-VISA driver, you will need to install at least the NI-VISA Run-Time Engine on the target machine. The
VISA Run-Time Engine can be included in the installer .
If you need more general information on building a LabVIEW installer, refer to
Introduction to the LabVIEW Application Builder.