Solution
If you installed the driver through an executable, you must locate the drivers that were installed and move them to the correct folder. On a Windows computer, this location of the driver is frequently
<Program Files>\IVI Foundation\VISA\my_driver\ where
my_driver is the name of the driver you installed. For Mac OS, the location is frequently
<Applications>\IVI Foundation\VISA\my_driver\. The
my_driver folder will be the folder you need to copy to a new location.
If the driver you downloaded did not have an executable, make sure you have unzipped the folder, and then that folder will be the one that you need to move.
Now that you have located the driver folder, do the following to add the driver to LabVIEW:
- Exit out of LabVIEW if it is currently loaded in memory.
- Copy the driver folder to the following location for a Windows computer:
- <Program Files>\National Instruments\LabVIEW (year of LabVIEW you are using)\instr.lib
- The location could also be under <Program Files (x86)> depending on if you are using a 32 or 64 bit version of Windows or LabVIEW.
- For a Mac computer, copy the driver folder to the following location.
- National Instruments\LabVIEW\instr.lib
- Rename the driver folder to the driver name you would like to appear in LabVIEW.
- Re-open LabVIEW.
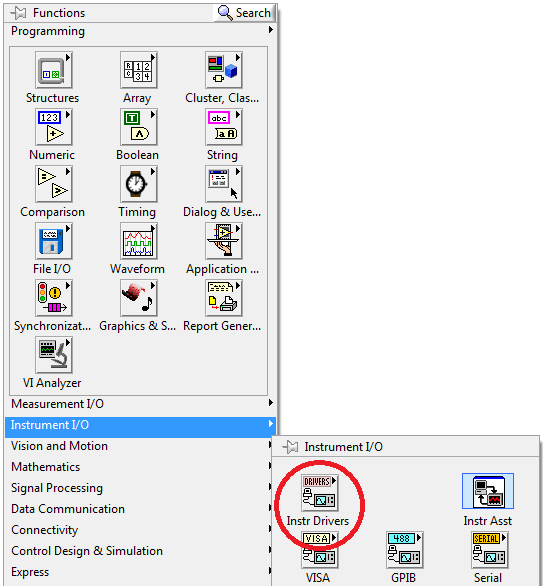
- Open a new VI and right-click on the block diagram to open the Functions Palette.
- Your instrument drivers should appear under Functions » All Functions » Instrument I/O »Instrument Drivers on the Functions Palette as shown below.
