Solution
Only controllers that are on the same subnet will initially show up in the Remote Systems branch in Measurement & Automation Explorer (MAX).
However, there are two ways to change the IP address of a controller remotely even if the controller does not show up in Remote Systems. Both of these methods require knowledge of the existing IP address.
NI MAX Remote Systems
1. Open MAX (
Start»All Programs»National Instruments»NI MAX)
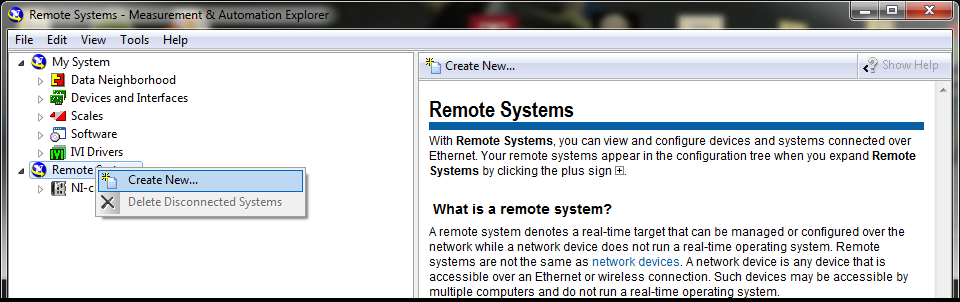
2. On the left-hand tree, expand the
Remote Systems branch
3. If the target does not show up in the sub-tree, then add it manually:
- Right-click Remote Systems
- Select Create New...
- Select Remote Device (not on the local subnet)

- Click Next
- Enter the IP Address of the target
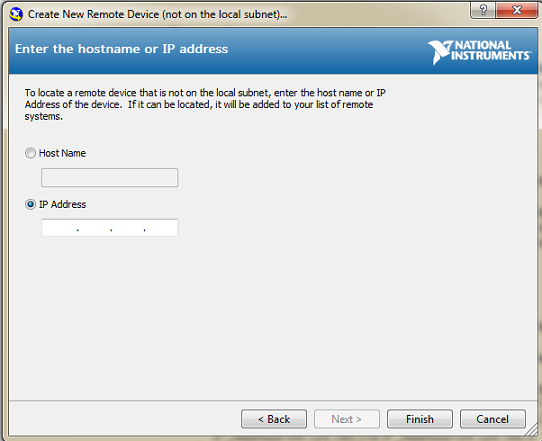
- Click Finish
- The target will appear in the main Remote Systems list if it is present on the network
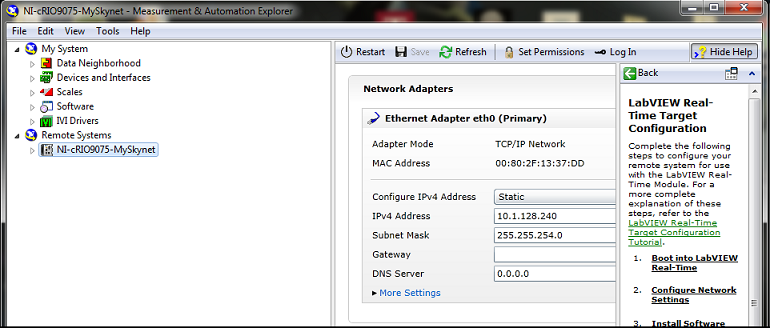
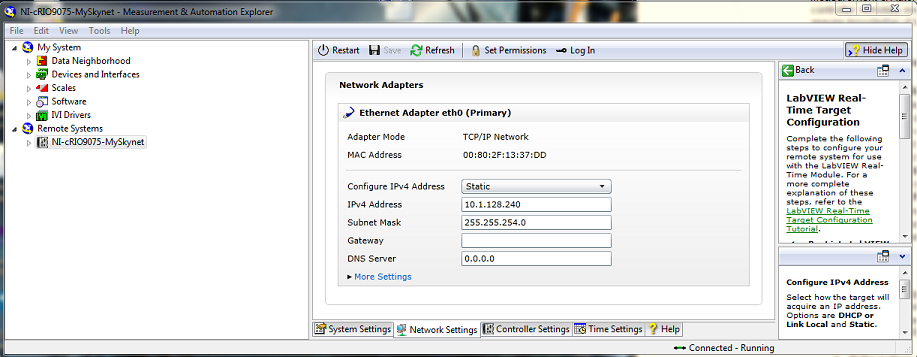
4. Select the target in the Remote Systems list by left-clicking it
5. Change the IP address settings under the
Network Settings bottom tab as needed
WebDAV / FTP Method
1. Use WebDAV (see related links below) or FTP to copy the
NI-RT.INI file from the Real-Time target to the host computer.2.Open the
NI-RT.INI file in an editor like Notepad by double-clicking it. Click
Open if a dialog box appears.
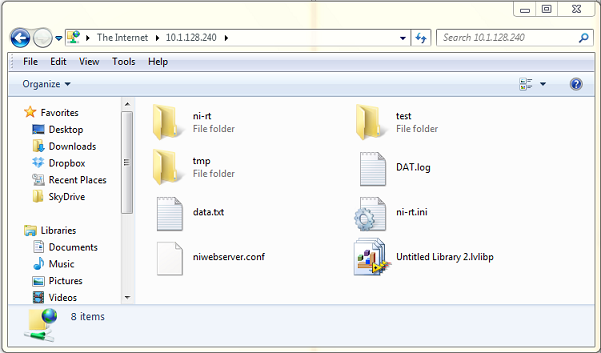
3. At the bottom of the file there is a section named
TCP_STACK_CONFIG.
4. To change the IP address you must: Save the file as
NI-RT.INI locally (such as the Desktop). Make sure it is named
NI-RT.INI.
5. To change the IP address change the value of the key
IP_Address.
6. For example, to change the IP address from 64.124.190.3 to 64.124.190.4, change the line:
IP_Address=64.124.190.3 to IP_Address=64.124.190.4
7. Use WebDAV or FTP to transfer the file back to the controller.
8. Reboot the Real-Time target.
Note:
If the above methods fails, try to ping the controller. If the ping fails, the computer may not have the necessary permissions or there may be a network problem.
A last resort is to move the Real-Time target to the same subnet as the host PC temporarily, reset the IP, and configure the new address using NI MAX.
See the links below or contact your network administrator for more information.