There's three ways to use your CompactRIO system to generate and acquire signals from its C series modules:
Using the Scan Engine
Follow the Acquire and Analyze Signals With LabVIEW Real-Time tutorial to get started with data acquisition using the Scan Mode. Please note that for output modules, the module's nodes will have an input terminal, instead of an output terminal, so you can write the output values directly to them.
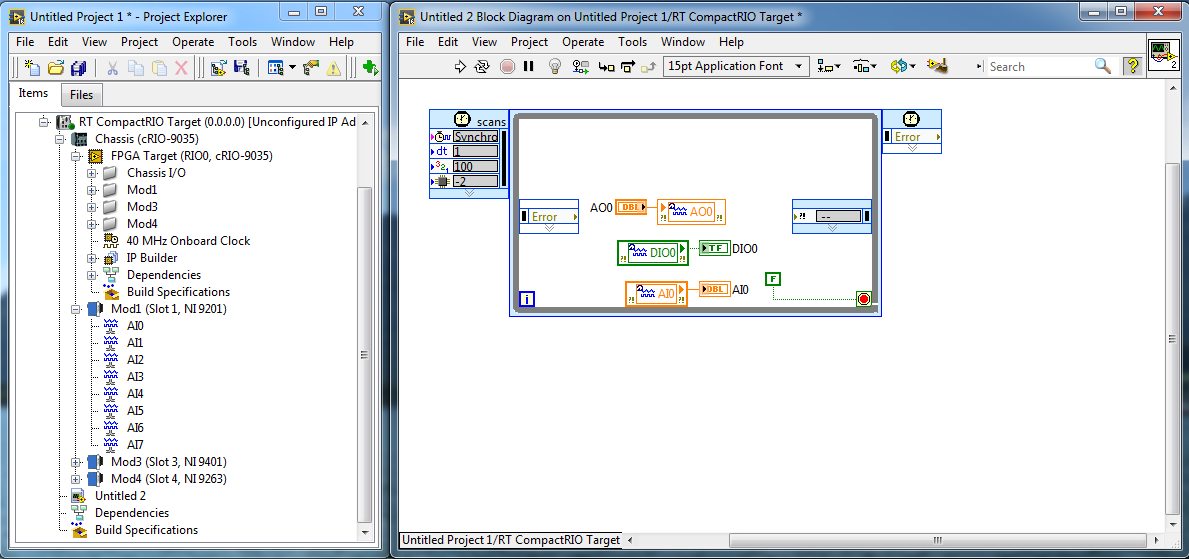
Image: On the left, the target with its modules in the project explorer. Note how the modules are in the same level as the FPGA target. In the right is the block diagram, in which an analog output value is written to one of the module's terminals, and both an analog input and digital input values are being read back in the processor.
Using the FPGA
Follow the Getting Started With LabVIEW FPGA tutorial to see what it’s like to program in LabVIEW FPGA, and implement basic tasks using analog and digital I/O.
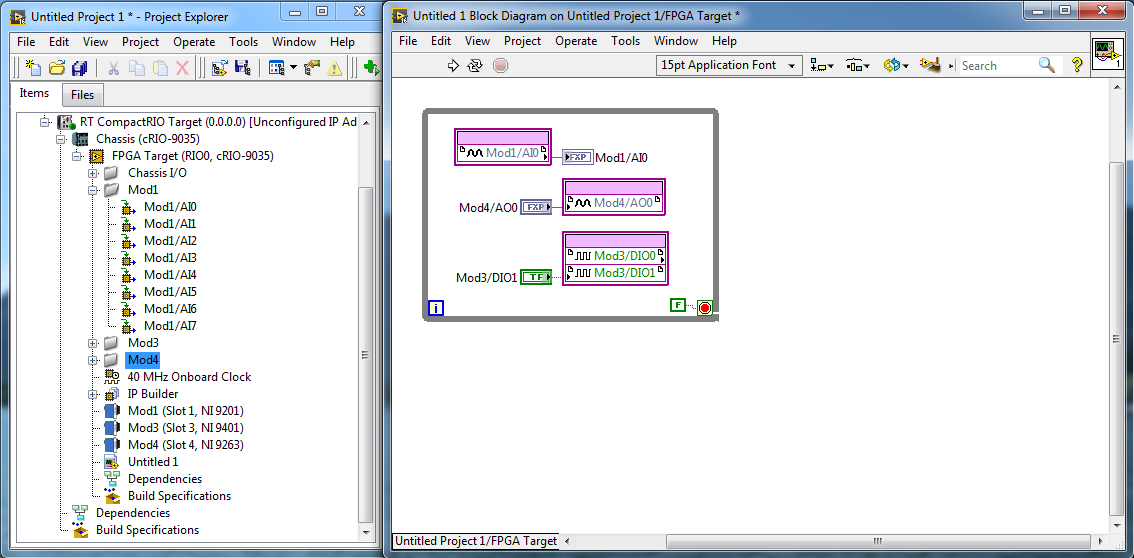
Image: On the left, the target with its modules in the project explorer. Note how the modules are inside the FPGA target's hierarchy. In the right is the block diagram, in which an analog output value is written to one of the module's terminals, as well as a digital output boolean. There are also an analog input and digital input values being read back in the FPGA.
Using DAQmx*
*Note: DAQmx is not supported in all CompactRIO controllers. More information here: NI-DAQmx on the CompactRIO
Follow the Using CompactRIO with the NI-DAQmx API tutorial to set up a simple acquisition using the NI-DAQmx API.
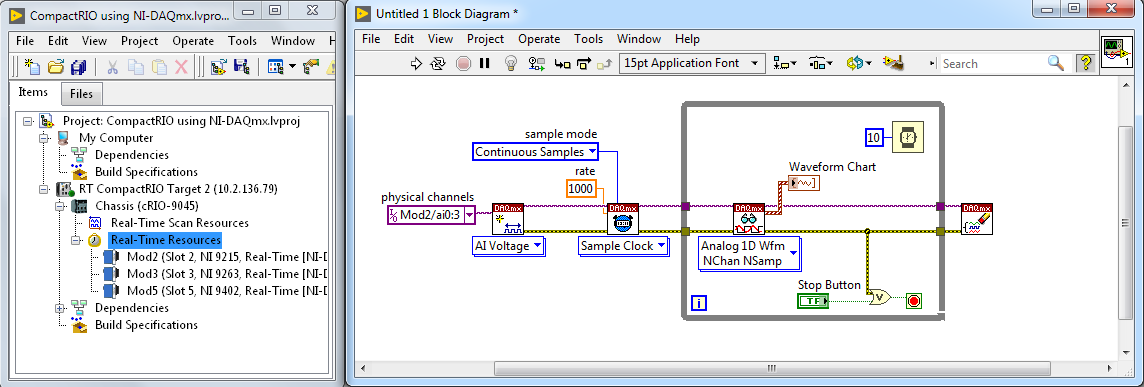
Image: On the left, the target with its modules in the project explorer. Note how the modules are inside Real-Time Resources section. In the right is the block diagram, in which the DAQmx API is used to read the voltage input from 4 analog channels from module number 2 at 1000 Hz.
Additional Information
Find in the next table the main differences between Scan Mode, and the FPGA Interface:
| Scan Mode | FPGA | DAQmx |
|---|
- Ease of Programming: Drag and drop your I/O variables directly into your LabVIEW Real-Time VI during development.
- Ability to Dynamically Detect I/O Modules: Slots not configured through the project automatically detect inserted modules. You can then configure these modules through the variable API.
- Fault Engine: The NI Scan Engine features the built-in NI Fault Engine that throws errors deterministically.
- Diagnostics and Debugging: With the Distributed System Manager, you can view current values and faults as well as override current I/O values while your program is running.
|
- Maximum Performance and Reliability: Because there is no OS on the FPGA chip, the code is implemented in a way that ensures maximum performance and reliability.
- High-Speed Waveform Acquisition/Generation (>500 Hz): You can use single-point I/O with multichannel, tunable PID or other control algorithms to implement deterministic control with loop rates beyond 1 MHz.
- Custom Triggering/Timing/Synchronization: With the reconfigurable FPGA, you can create simple, advanced, or otherwise custom implementations of triggers, timing schemes, and I/O or chassis synchronization.
- Hardware-Based Analysis/Generation and Coprocessing: Many sensors output more data than can be reasonably processed on the real-time processor alone.
|
- Simple Configuration: It doesn't require a lot of low level programming, since the driver does a lot of that configuration for you.
- Familiar API: This is the API used by other DAQ cards, so it's familiar to programmers that have used other DAQ platforms.
- Limited Support: DAQmx is only supported on some cRIO devices, as shown in the link above in the DAQmx section.
|
Review the C series modules compatibility with Scan Mode, FPGA, and DAQmx in the following document: C Series Module Compatibility Chart
Check out the NI LabVIEW for CompactRIO Developer's Guide for more information about programming best practices, and answers to the common development questions in the platform.