There are three possible procedures to upgrade the firmware of a myRIO: using the
myRIO Getting Started Wizard, using the
Measurement and Automation Explorer (MAX), or using
Web Configuration.
myRIO Getting Started Wizard
These are the steps to upgrade a myRIO's firmware using the
myRIO Getting Started Wizard:
- Connect the myRIO to your LabVIEW computer using a USB cable.
- Power the myRIO up.
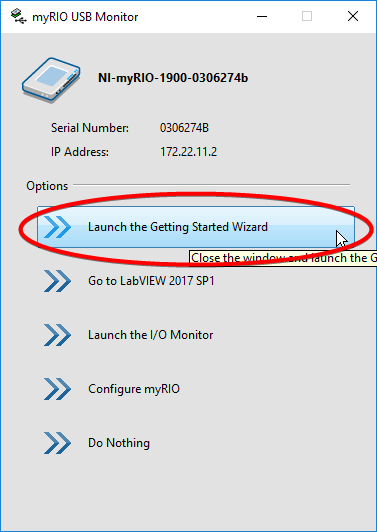
- The myRIO USB Monitor should pop up automatically. Click Launch the Getting Started Wizard:

If the USB Monitor does not show up you can launch the Getting Started Wizard manually here: C:\Program Files (x86)\National Instruments\Shared\myRIO\Getting Started with NI myRIO.exe
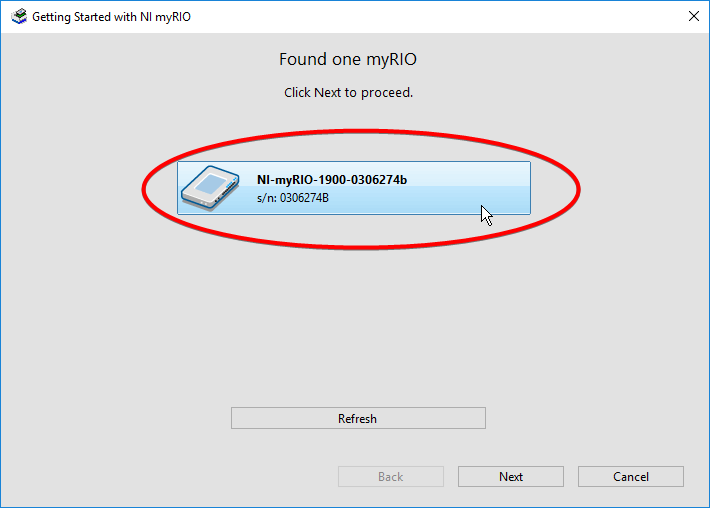
- Select the correct myRIO:

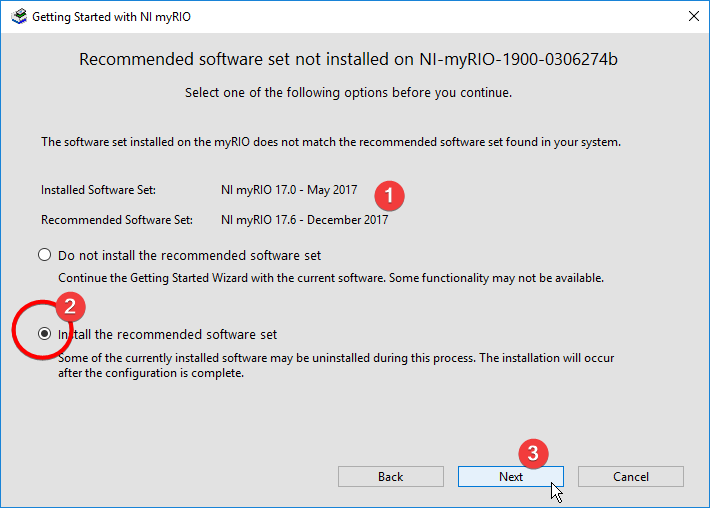
- If there is a newer firmware available you get asked if you want to upgrade in the next step. Confirm the version number, select Install the recommended software set and click Next.

- The upgrade process will take some minutes, during which the myRIO USB Monitor will pop up several times. Wait for the installer to finish.
NI MAX
Find the detailed instructions on this upgrade mode here:
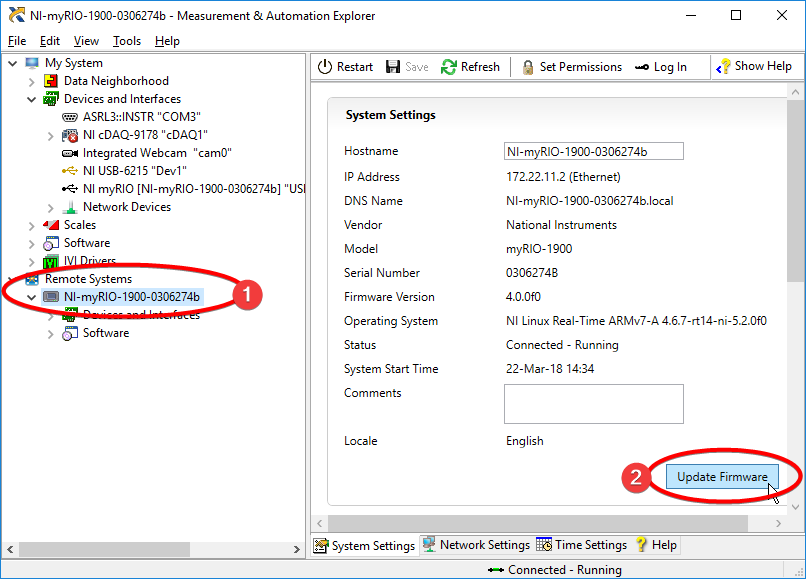
Upgrading Firmware on my NI Linux Real-Time Device. Be aware that your myRIO shows up in MAX in two different places: under
My System » Devices and Interfaces and
Remote Systems. The firmware upgrade process can only be started in the latter one:

Web Configuration
Find the detailed instructions on this upgrade mode here:
Upgrading Firmware on my NI Linux Real-Time Device.
Additional Information
If you previously used Measurement and Automation Explorer (MAX) to install additional software beyond the default software set to myRIO, it will be wiped after this new installation. To install additional software to myRIO after the Getting Started installation, use MAX.