Moving VIs in a LabVIEW Project to a Different Folder

Updated Aug 23, 2023

Reported In

Software

  • LabVIEW

Operating System

  • Windows

Issue Details

  • I would like to move some VIs in my LabVIEW project to a different file path, but when I drag my VIs to a new folder using Windows File Explorer I receive this warning in my project: "VI has been deleted, renamed, or moved on disk."

 
What is the proper way to move VIs without causing problems?
  • I want to save all my VIs and subVIs into a separate folder or directory and keep them linked correctly.

Solution

In order to prevent this warning, open your LabVIEW project and select the Files tab. The following directory tree shows where the VIs for the project are located:


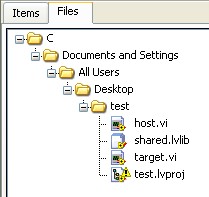
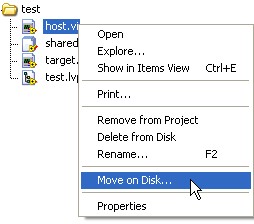
If you would like to move the VI to one of the visible directories, drag and drop the VI to the folder. To use a different folder or disk drive, right-click the VI and select Move on Disk....This will move the VI to the directory you specify and keep it linked correctly within the project.

Additional Information

If you have already moved the VIs in your project, there are two methods to relink them to the project.
  • Right-click the missing VI, and select Replace with... or select Browse... when opening the VI to select the directory the file is located in.
  • Modify the VI Search Path in the Tools»Options»Paths menu to search entire directories for multiple missing VIs. Refer to Adding a Directory to VI Search Path for more information.
Note: If you are trying to relocate VIs that are located in the Dependencies folder, this text editor method will not change the path seen by the project. The *.lvproj file will appear to use the new path in the text editor program, but it will not be reflected in the project itself. You need to drag the VI into the My Computer area to and update the path using the same methods mentioned above.